Smiles and Sunshine

Custom Crochet

Smiles and Sunshine

Dear Readers,
As you can tell, my postings have been sporadic at best over the past few years. I’ve recently begin blogging again, but under a different blog name. So much in my life has changed since I began blogging, first and foremost, I became a mother.

Please visit me at http://mamashauna.wordpress.com I’d live to see you and read your comments!

Leave a comment »

The Tale of a Yarn Addict

Love this little poem!

The Tale of a Yarn Addict

I don’t need baskets,
I don’t need hooks.
I definitely don’t need more crochet books.

I don’t need patterns,
I don’t need shelves,
..Perhaps I could use some of Santa’s elves.

I’ll walk by the aisle,
I’ll just ignore,
All the great things in this lovely store.

“I’ll just walk by,”
I tell myself.
“I won’t even take anything off the shelf!”

Oh!  Look at this hook!
Did you see the color?
I know I don’t have one like that in my clutter.

The yarn is so pretty!
So much I see.
I’m absolutely sure that it’s all for me!

Fill up the basket,
Put the yarn in.
Probably next time, my conscience will win!

– By Rebekah Bowers
Warming the Heart

View original post

Leave a comment »

Zip, Zip WIP, part 2

Some progress was made yesterday. I’m a bit ashamed to say that I’ve never installed a zipper before. Finally I called a 4H instructor that I know and asked if I “really” had to follow the directions on the zipper package, because that would require pulling out my sewing machine, finding the zipper foot, and then performing numerous YouTube searches on how to use and install a zipper foot. As it was, I had needle and color coordinated thread. I wanted to use that.

My friend suggested I baste the zipper on with large stitches, so I followed her advice. Then I sewed up the sides. I still need to see in the lining, stitch the zipper up for real, and make a cute pull tab to attach to the zipper.

20130822-111303.jpg

20130822-111327.jpg

20130822-111337.jpg

Leave a comment »

A Dress out of a Dream… In Progress

Tonight’s work in progress is one I’ve been anticipating for a while… It’s a beautiful tutu dress. I am working with a friend to create at least two of these beauties. I would love to show you a picture, but the pattern designer has made it clear that her pictures are her property, so I will have to send you to this Etsy shop where I purchased the pattern named “The Emma,” and you can view the gorgeous photos there.

This dress can easily be used for a bridesmaid dress or a party dress. I am in charge of crocheting the top part, also known as the bodice, and my friend will add the tulle tutu. We will each end up with one dress. She will give hers to her little girl, and mine will be for sale.

I’m using an off-white yarn that looked like cream in the store and looks very white in my living room. I think my friend will be using different colors of tutu material, maybe purples, blues, and white. I’m looking forward to seeing how they turn out!

The designer of these dresses sells the finished products for over $100 for little girl dresses. She also makes an adult sized dress that can be used as a wedding dress, which she sells for $200. I think it would be such an honor to crochet a wedding dress.

For now, this is all I have. I will try to post more pictures tomorrow. Hopefully I will have finished the straps and the edging by then. This version shows yarn markers, which will be removed. They help me to know where to stitch the straps. As you can see, I’ve started one strap, and it is time to start the next one.

20130819-222826.jpg

1 Comment »

Zip, Zip, WIP

20130818-172442.jpg
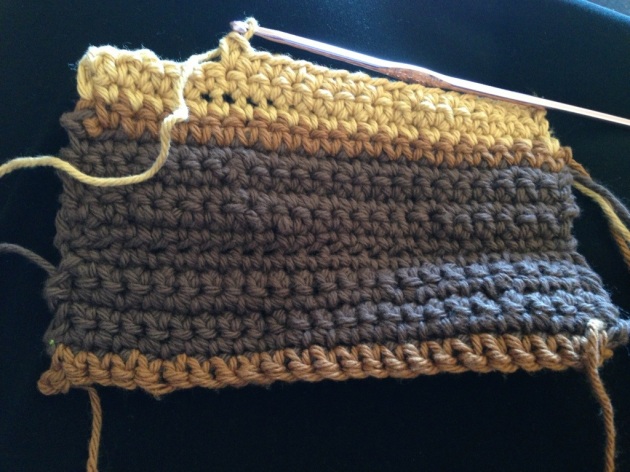
Above: The bottom of the zipper pouch. It is worked from the bottom up.

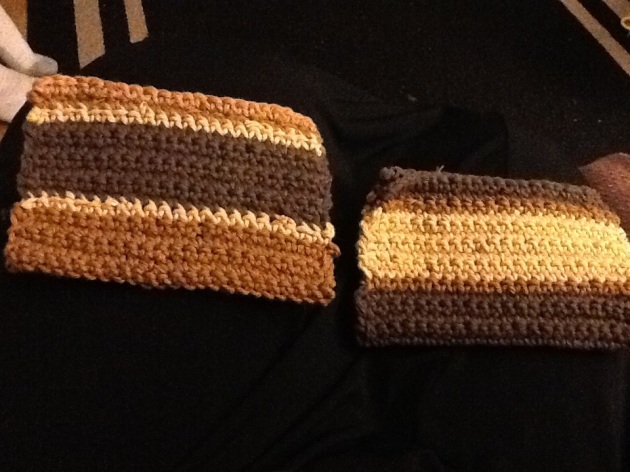
Below: the finished crocheted fabric of the zippered pouch, folded in half, as it will be in the completed project. I am now stitching a second pouch in the same colors, only with the darker color as the middle stripe.

20130818-205502.jpg
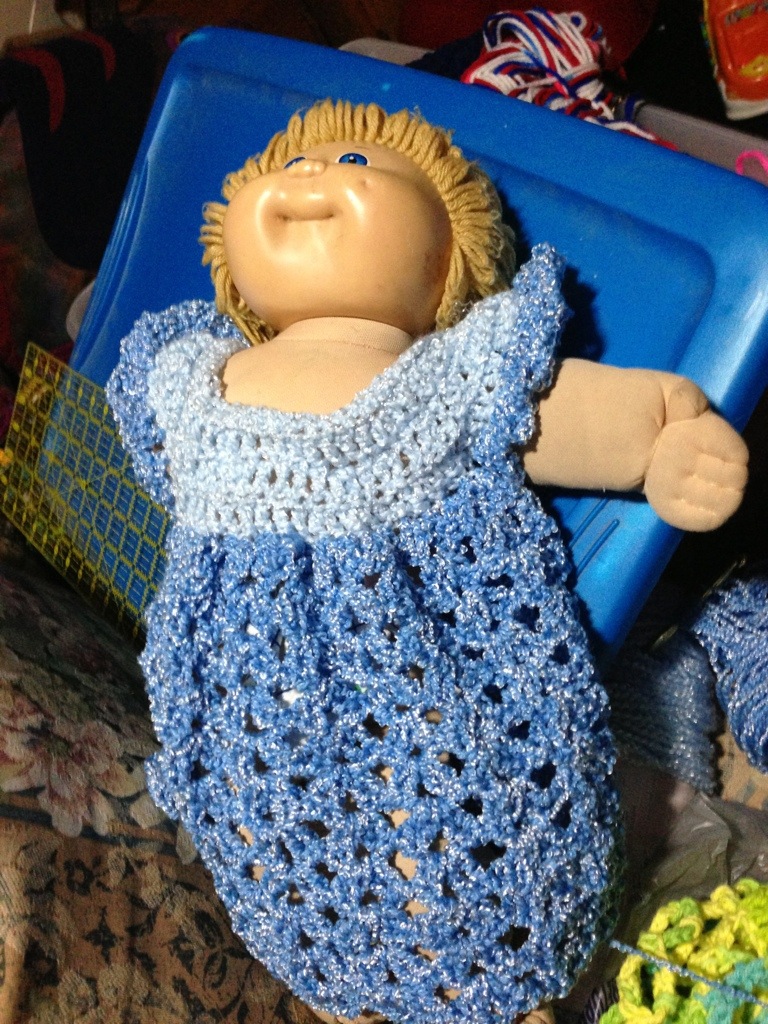
For you non-crafters, WIP stands for Work-In-Progress. As a full time teacher, it seems that I get enough acronyms in my life that I really don’t need more, but writing WIP does save time, so there it is.

This, my friends, is not a washcloth. (Although I think it would make a nice one.). It will become a lined zipper pouch. It is made from 100% soft cotton worsted weight yarn, and crocheted in single stitch. I’m not using a pattern, so I’m going to make a few notes to myself right now. Technically, I guess you could say I’m writing the pattern as I go. I’m planning on making two matching pouches, so it will help to have the pattern handy to refer to.

Zippered Pouch Pattern

Finished size: 4″ x 6″ (This pattern can easily be adapted to any rectangular size.)

Materials: size G 4.25 mm hook, scrap cotton yarn, such as peaches and cream, (approx 50g), one 7″ zipper, fabric for lining, yarn needle, needle, and thread.

Color a: soft brown (Sugar ‘n Cream 01130)
Color b: medium brown
Color c: camel (Peaches and Cream 89)

Note: When I make these again, I will choose a different width. When I took the custom order, I didn’t realize that zippers generally come in 5″ or 7″ lengths. So, I’ll need to shorten the zipper. I obviously haven’t worked very much with zippers!

Another note: Do not crochet the stuff in parenthesis. It is just there so you can double check your work at the end of each row.

Row 1: with color a, chain 24 (23 stitches)

Row 2: Turn. Single crochet in second chain from hook. single crochet in back loop only across. (23 stitches)

Row 3-9: Turn. Chain 1. single crochet (in both loops here and throughout) across. Fasten off by chaining one, cutting the yarn, and pulling yarn through the loop to create a knot. (23 stitches)

Change colors.

Row 10: Turn. With color b, slip stitch in the first single crochet, single crochet in the same stitch. Single crochet across. Fasten off. (23 stitches)

Switch colors.

Row 11: Turn, with color c, slip stitch on the first single crochet, single crochet in the same stitch. Single crochet across.(23 stitches)

Row 12-18: Turn. Chain 1 (turning stitch). Single crochet across. (23 stitches)

Fasten off.

Change colors.

Row 19: turn. with color B, slip stitch in the first single crochet, single crochet in the same stitch. Single crochet across.(23 stitches)

Fasten off.

Change colors.

Row 20-21: Turn. Chain 1 (turning stitch). Single crochet across. (23 stitches)

Other side: turn project: repeat row 2-21, work in the other side (now the back loop only) of the initial chain.

Finishing:

Cut fabric 5″x13″. Hem fabric 1/2″ all the way around. Sew zipper to fabric, making sure to leave the handle end of the zipper accessible on one end. As you will be shortening the zipper on the other end.

To Shorten the zipper, sew over the edge you want to shorten several times. Cut the zipper off 1/2″ below the sewed section. If it is really close, y don’t have to cut the zipper, just hide the edge in the lining.

Unzip the zipper and pin the lining fabric to the crocheted piece, wrong side to wrong side. Sew the two pieces together.

Finally, use yarn to whipstitch the sides of the pouch together. secure both ends with double knots. Use a yarn needle to hide the yarn ends. Test the zipper to make sure everything fits together nicely.

Enjoy your new zipper pouch!

Remember, WIP. But if you want this WIP pattern, copy it now. Because I might take it off the site and try to sell it once it is complete and tested.

20130818-233808.jpg

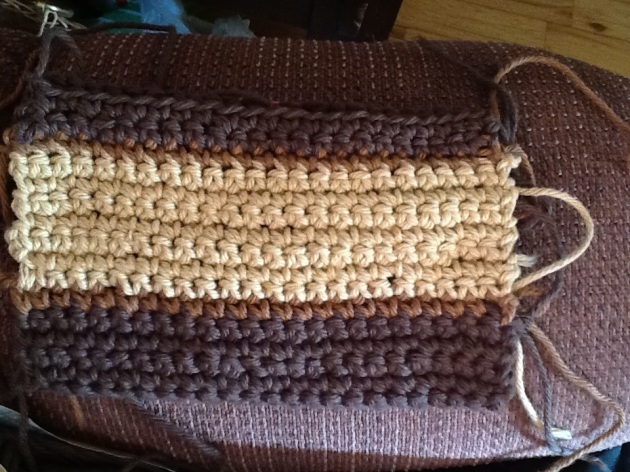
Above: pouch crocheting is done. Next step is to add fabric liner and zipper.

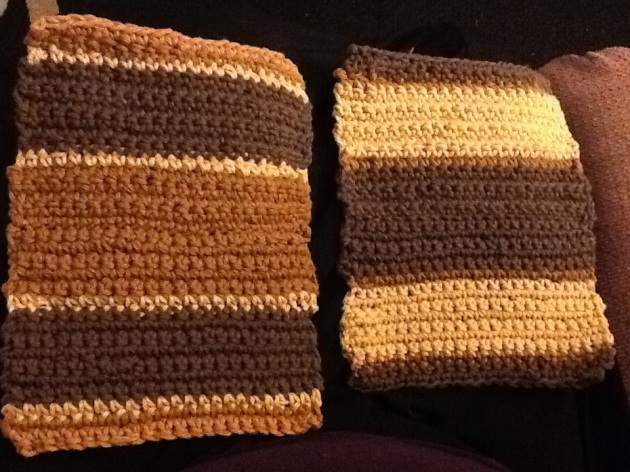
Below: really, these aren’t washcloths. But wouldn’t they make nice washcloths? The picture is of both pouches open. They really are the same size. The angle of the camera just makes one appear larger. If I remember, I’ll take some better pictures tomorrow.

20130818-234104.jpg

2 Comments »

Almost Perfect… Washcloth Reflections

20130807-233852.jpg

One thing about creating handmade items is that they are never quite perfect. For my family, I don’t mind too much. My family is forgiving. Family understands that my son might fall down, I might look up, and I might and lose count of my stitches, and might be a stitch short at the end of the project. But how do consumers view mistakes like this?

I would hope that people purchasing handmade items expect little flaws. Of course I want to make my washcloths as perfect as possible. But if a yarn splits or a stitch is missed, I hope they can be as forgiving as my family.

Tonight I finish this set of washcloths for a wonderful lady. I’ve barely known her, and only online, but I can tell she works hard to support other mothers and she loves her family very much. Whether these washcloths will be used by her or given as a gift, I hope very much that she enjoys getting her package in the mail later this week!

1 Comment »

Scrub-a-Dub-Dub

This week’s project is a set of six crocheted washcloths. I am a bit of a perfectionist, so it took me a while to come up with the pattern I liked and to answer a few questions.

Here are the answers I found.

• A washcloth is for the bathroom, a dishcloth is for the kitchen. They can be the same size, but some prefer dishcloths to be bigger because they use them to dry dishes. Now growing up, I believe I called that a dish towel, and we used something called a dish-rag to actually clean the dishes. Maybe now the “rag” has been replaced with “dish-scrubber”… I don’t know.

• Washcloths can be smaller, especially for children and the elderly who might have trouble wringing out larger cloths. Online in Etsy stores, I found sizes ranging from 6″ square to 10″ square. Size is subjective and personal. It is important to remember that these thick washcloths will shrink because the are made from 100% cotton. In stores like Target, it seems like the more expensive the washcloth, the larger it was. I settled on 8-1/2” squares.

• Crochet often starts at one end with a chain of yarn for an edge. It is difficult to make all edges the exact same on such a small project if you start on one side. So I chose a pattern that starts in the center and works it’s way out.

Here’s number one!

20130805-223832.jpg

I decided on $5 per cloth or 3 for $12. Let me know if you need some!

1 Comment »

I Love Custom Orders!

I’ve been a busy bee preparing custom orders lately. It’s a learning experience for me. For example, don’t buy specialty yarn until the customer has committed to buying the order. And, it might help to have color swatches available. Do you know how many shades of purple there are? My goodness!

Also, I love giving my projects little finishing touches. For these pink and black bridal barefoot sandals, I added some sweet pink ribbon rosettes with faux rhinestones and faux pearls. I started by designing my own ten petaled flower, but it didn’t quite fit, so I found a lovely free pattern here. Thank you Ska Mama! This is now my favorite flower!

20130801-140827.jpg

20130801-140859.jpg
I love learning new patterns and stitches, and custom orders are allowing me to grow and develop my crocheting skills more each day! Keep ’em coming! I love custom orders!

3 Comments »

Tiny Blue Dress

I hooked this baby toddler tunic dress today, but I don’t know how long to make it or what size it is. I’m guessing 0-3 months. It fits 2T to 4T as a cute top to be worn with leggings or shorts. I think I need a infant sized doll. So I can test my patterns out before I blog abut them!
20130717-003854.jpg

At least I know my cabbage patch doll likes it!

20130717-004207.jpg

2 Comments »

Braided Beanie Hat

This child size hat has been sitting unattended for quite some time. I wanted it to be for a three year old, but it was too large. So I started over and made a smaller one. This one fits a five year old nicely. Today I added the braids. I’m going to try to sell it today at the farmer’s market. Just not sure what price to put on it.

20130712-135354.jpg

Leave a comment »